Agent-native CAD / CAM · free for non-commercial use · exact B-rep

CAD that talks back.

Say what you want and it gets built. Point at what you mean and it gets changed. Tweak by hand when that is quicker. No feature tree to fight, no menus to memorise, and every edit stays reproducible. From first idea to exact STEP, print-ready STL and shop drawings, on your own machine.

60-second tour — a real session, real agent, only the thinking time sped up

Sound on. A real session with the real agent; only the thinking time is sped up.

Describe a part in plain wordsPoint at faces, edges and bodies in chatFusion-style ribbon for hand tweaksSketches on any faceISO and inch (UNC/UNF) threadsInches or millimetresExact STEP, tolerance-controlled STLShop drawings with hole tablesSlice for 3D printing with your installed OrcaSlicer, layers in the viewerExperimental GRBL CAMParametric part libraryPick your Claude model, plug in MCP serversUnit tests and graded agent evals Describe a part in plain wordsPoint at faces, edges and bodies in chatFusion-style ribbon for hand tweaksSketches on any faceISO and inch (UNC/UNF) threadsInches or millimetresExact STEP, tolerance-controlled STLShop drawings with hole tablesSlice for 3D printing with your installed OrcaSlicer, layers in the viewerExperimental GRBL CAMParametric part libraryPick your Claude model, plug in MCP serversUnit tests and graded agent evals
Get started

One download and one sentence.

  1. Download the app for macOS or Windows and open it.
  2. Install Claude Code, Anthropic's free command-line tool, and sign in once. The app is not allowed to bundle it, so on first launch it shows the exact command and checks for you.
  3. That's the setup. Everything runs on your machine; nothing leaves it except the conversation with Claude.
  4. Type your first part. Something like this, and watch it appear:
your first messageMake a 60 × 40 × 8 mm mounting plate with four Ø5 holes 8 mm in from each corner and a Ø20 boss 15 mm tall in the middle with a Ø8 through bore.
Watch this exact session as a tutorial →
AgenticCAD latest · desktop appreleased
Free for personal, hobby, research and educational use
A$99 + tax per user, per year for commercial use · buy licences

Needs Claude Code. The app does not bundle Anthropic's Claude Code; install it once (free, one command) and sign in with your Claude account or API key. The app walks you through it on first launch. Details.

Intel Macs and Linux: use the source zip for now.

Prefer to run from source? Linux, Intel Mac, or hacking on it.
# any platform with Python 3.12, inside the unzipped source zip or a clone of github.com/agenticcad/agenticcad
python3 -m venv .venv && .venv/bin/pip install -r requirements.txt
.venv/bin/python server.py        # then open the address it prints in your browser

Same app, same Claude Code requirement. All releases: github.com/agenticcad/agenticcad/releases.

Free for non-commercial use under PolyForm Noncommercial 1.0.0. Commercial use is A$99 per user per year; see licensing.

Step 1 · Create a model

Describe it. Point at it. Tweak it.

Three ways to shape a part, and they all end in the same place: one build123d script that the exact kernel executes. No feature tree, no hidden state, nothing you cannot read.

01

Describe

“60 × 40 × 8 plate, four Ø5 holes 8 mm from the corners, a Ø20 boss with a Ø8 bore.” Attach a photo or a napkin sketch if you have one. The agent writes the model with named dimensions.

02

Point

Click a face, an edge or a body and it becomes a chip on your message, with its exact type, centre, normal and size. The agent works on that face, not a guess.

03

Tweak

Press/pull, holes, fillets, chamfers, shells and sketches from a Fusion-style ribbon, or change a number in the Parameters card. Written into the same script, undoable, visible to the agent.

Live · real kernel output

Point at a face. See what the agent sees.

This viewer runs the app's renderer on meshes baked from the real kernel. Hover and click faces: the chip and the [Selected geometry] block are exactly what a chat message carries.

design.pybuild123d · exact
Viewer
loading…
click a face to add a selection chip…
Put a 1 mm chamfer on the outer edge of this face.Send
# what the agent receives with your message [Selected geometry] (click a face)

Because the message carries the geometry, the agent can write faces().sort_by_distance((x, y, z))[0] and hit the face you meant, then confirm with inspect_model or a screenshot. Every rebuild renumbers faces, so the app matches chips again by type and centre.

Play the “point at a face” tutorial →
Manual, still code

“I just want to tweak it.”

Sometimes you know exactly what you want and do not want to say it. The ribbon works like a desktop CAD tool: pick, type a number, ↵. A command dialog walks you through each tool with a live prompt, chips for what you picked and unit fields. Under the hood the operation is appended to the body's expression in the script, so it is undoable, reproducible and visible to the agent.

_plate = plate.part
_plate2 = _plate + extrude(_plate.faces().sort_by_distance((7, 0, 19))[0], amount=5, dir=(0, 0, 1))
_plate3 = tap(_plate2, "M4", at=(18, 0, 4), depth=6, axis=(0, 0, -1))
result = {"Plate": _plate3.fillet(2, [*_plate3.faces().sort_by_distance((7, 0, 24))[0].edges()])}
Play the ribbon tutorial →

Hover a tool. Shortcuts match the app: B C O K create, Q H F X L V modify, I measure, D drawings, P slice.
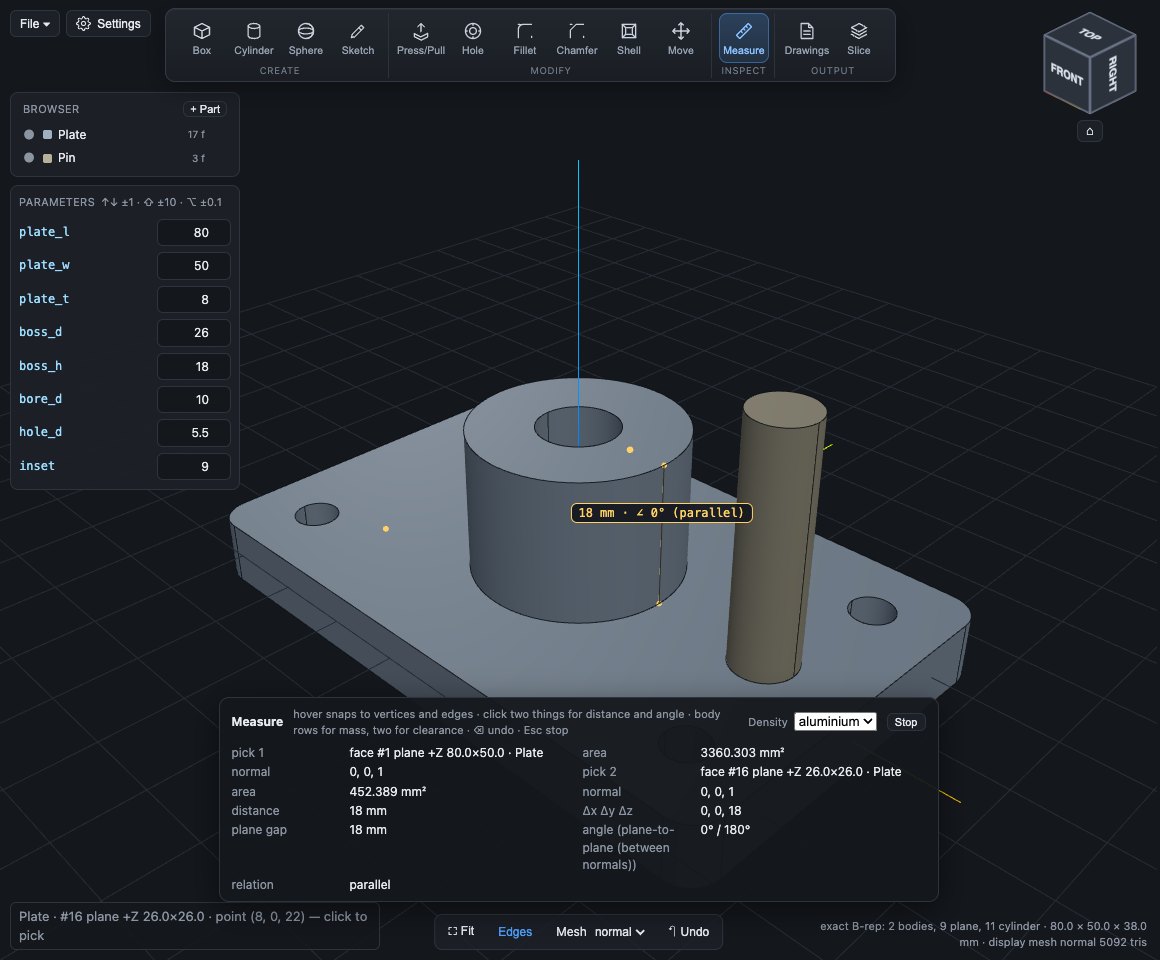
The Parameters card under the Browser and a live measurement between two faces

Sketches on any face

Select a face, press K: rectangles, circles, polygons and slots with grid snap. Stored as an editable block that is also a real Sketch the agent can extrude, cut or revolve.

Metric and inch threads

ISO metric (M4) and Unified inch (1/4-20, #10-32): tap drill, clearance, hex and socket heads, nuts and washers from the tables. tap(part, "M4", …) cuts the hole and drawings call it out as M4×0.7.

Parameters and measure

Every top-level number is a field. Measure snaps to vertices, edges and faces: lengths, radii, angles, hole spacing, mass, clearance between bodies.

Exact B-rep, not triangles

Planes, cylinders, cones, spheres, tori and B-splines from OCCT. The display mesh has exact normals; the geometry underneath is analytic.
Step 2 · Print it, or document it

Send it to the printer, or to the shop.

Most parts stop here. File ▸ Export gives you what a slicer or another CAD package needs, and one press of Drawings on the ribbon turns the model into a drawing you can hand to someone.

  • STL for 3D printing, tessellated only at export, at the resolution you choose in the dialog (or the agent picks a tolerance). One file for everything or one per body, so multi-part prints come out as separate meshes.
  • Slice without leaving the app: if OrcaSlicer (or Bambu Studio) is installed, set your printer, filament, layer height, infill and supports once in Settings, hit Slice on the ribbon, and the layers appear in the viewer with a slider, feature colours, time and filament estimates, plus G-code and 3MF. Or just say “slice this for my Ender 3 at 0.28 mm”.
  • STEP, exact: cylinders stay cylinders and bodies stay separate solids, so it opens cleanly in Fusion, FreeCAD, SolidWorks or a supplier's quoting tool.
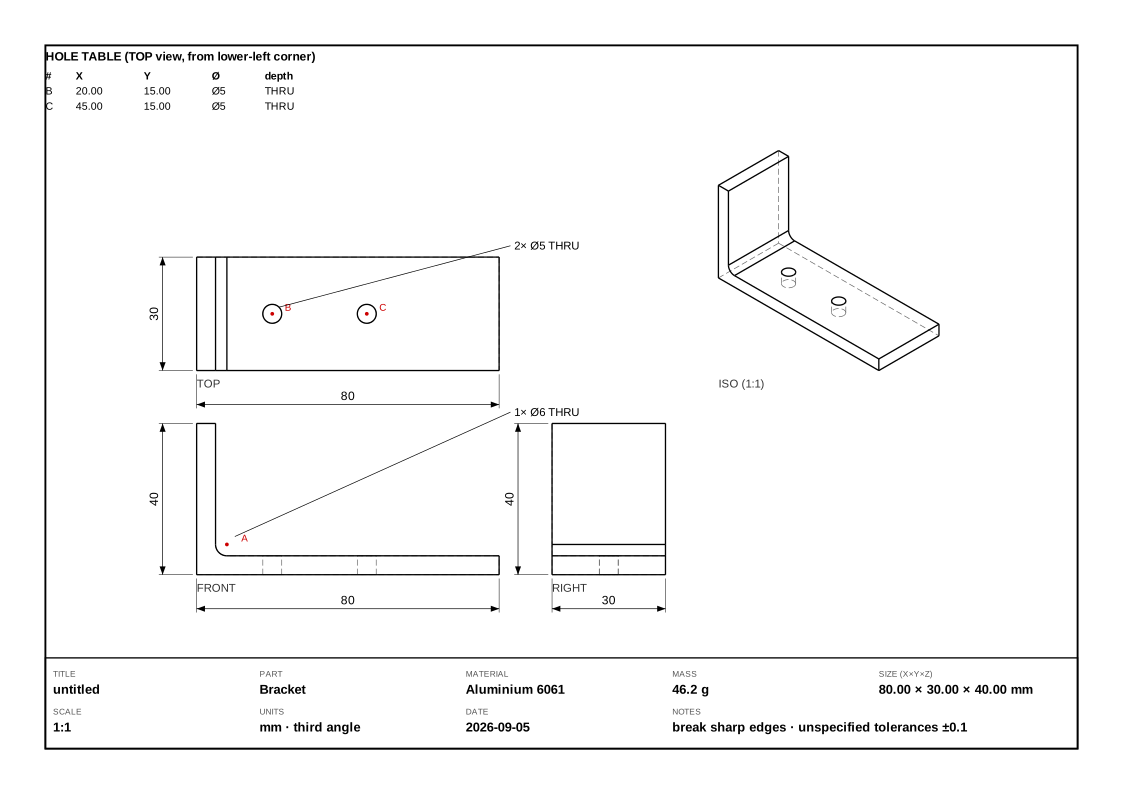
  • Shop drawings from the exact model: third-angle front, top, right and iso with hidden lines, overall dimensions, hole callouts and a lettered hole table, title block with mass and scale. SVG and DXF.
  • Ask for it: “export an STL at 0.05 mm for the Pin only” or “make drawings in aluminium” works too, because export and drawings are agent tools.
Export details in the docs →
Automatically generated shop drawing
Going further

Reuse, import, connect, trust.

The things you reach for once the first parts are done.

Part library

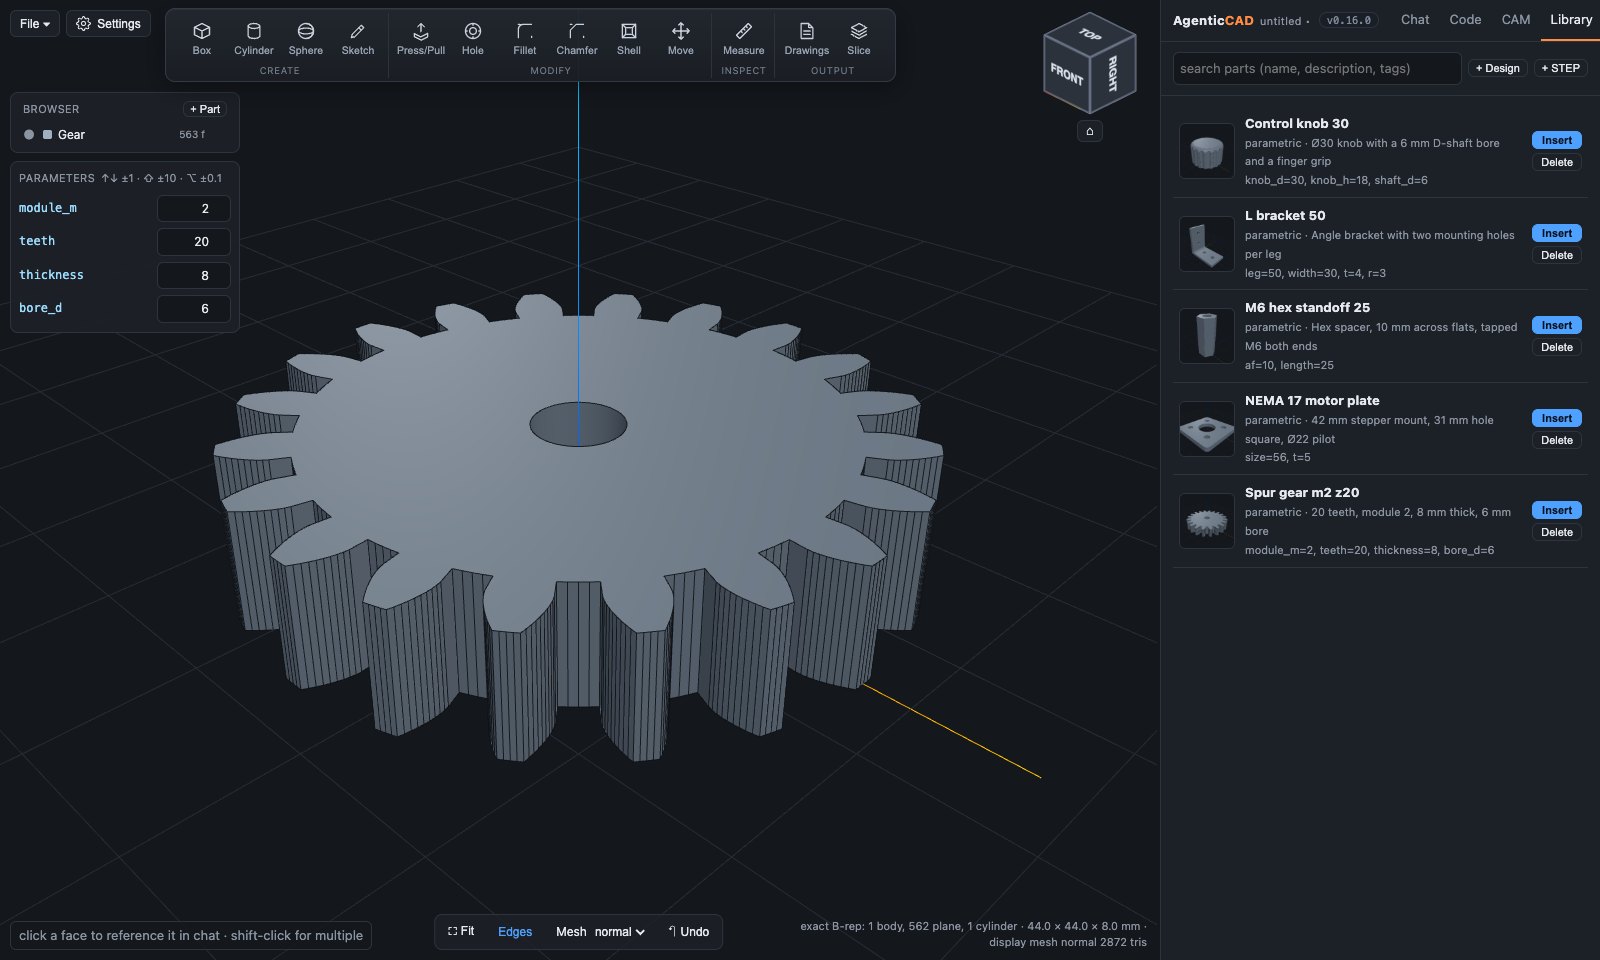
Parametric script parts and exact STEP parts with thumbnails and tags. Insert from the Browser with + Part, save any body to it, and the agent searches it before modelling a standard part.

STEP import

Drop a .step on the viewer: as a new body in the current design, as a new design, or straight into the library. Exact, and referenced from the script so the design stays reproducible.

Reference images

Attach photos, sketches or old drawings to a message. The agent reads them directly; the dimensions you type override what it estimates.

Choose the model, plug in MCP

Claude Opus 5.5 by default. Settings for the model, effort, max steps, thinking summaries, web tools, standing instructions and MCP servers (stdio, http, sse) with live connection status. Restart the session in place.

Design as script

Rename, delete and add bodies, set parameters, sketch blocks and ribbon operations are AST rewrites of the same file. Every build is kept in history; Undo steps back through it.

Tested, and evaluated

123 unit and API tests run in seconds with no Claude calls. 26 agent evals run the real agent headless and grade geometry, programs and answers deterministically, with cost and steps per case.

Library tab — parametric and STEP parts
Part library tab with parametric parts and thumbnails
Experimental · CAM preview

CAM is in, and it is early.

Treat CAM as a preview. The toolpaths are geometrically correct and the post checks your machine's limits, but they are not yet optimised: expect long, conservative paths with many retracts, and no stock simulation. Good for learning and for simple parts you inspect first; not yet a replacement for your CAM package. The modelling side is where AgenticCAD is solid today.

Have a CNC router? Describe the job the way you would brief a machinist and the agent writes a second script, cam.py, against a small API: section, holes and stock_minus taken from the exact model; face, contour, pocket, adaptive, drill and parallel3d for the cuts. The GRBL post checks travel, spindle range, feeds and depth against the machine you picked and tells you before you press run.

Play the CAM tutorial (experimental) →
plate.cam.py — Generic 3018 · aluminium · toolpaths drawn from the real program
Toolpaths

The first lines of the exported G-code:

Licensing

Free to make things. A$99 a year to make money with it.

Non-commercial · free

Personal projects, hobby making, research, education, and use by charities, schools and public institutions. Full source, every feature, no account, no telemetry. PolyForm Noncommercial 1.0.0.

Commercial · A$99 per user, per year

Using it in a business, in products or services, or as part of paid work. One licence per person who uses it, billed yearly in Australian dollars, same software. Buy online with the number of users you need; tax is added at checkout where it applies, and the receipt is your licence record, nothing to install or enter. Questions and volume or site licences: agenticcad@prodevelop.com.au. Terms of sale.

Buy licences · A$99 + tax per user / year

Tutorials

Watch a session, step by step.

Simulated replays of real sessions: the chat, the tool calls, the code and the exact meshes at every step were generated by the kernel, not drawn. Play them, pause them, scrub them.